Shutter101
Issues encountered and the solutions
Initial Issues
During the creation of this first part of my blog, I would like to point out the repetitive tasks that I did and some problems that I encounter. And let us figure out on how can we automate this tasks.
-
First problem is Github page is not design to cater such content where large size of files are used. You can see that most of my images are quite large in size so it takes a while to render this images in Github pages. I need to compress each images. I am thinking if I could use third party packages which uses CLI. My goal is that every time I add images to certain folder, it will automatically compress the images to the appropriate size or before pushing any images to the repositories we could run a script to compress the images.
-
Adding description to all of the photos are time consuming, I have to look first for each properties of the images then add it to the description tag. I already have an idea on how to approach this problem. All of my images contains metadata. What does it mean? Photo metadata refers to the information embedded within a digital photograph that provides details about the image. This metadata includes various properties and settings related to the creation of the photo. Knowing this, I could extract the metadata of each images and list it down to a JSON file or in a Markdown file. But how could I automatically call out the description of each photos in a JSON or Markdown file. So that I don’t need of manually typing it in my README.md?
Tasks for Week 2
- For the next update of this blog, I will add addtional places that I visited here in Germany and share any random facts about the ciy.
- I will do further study on how to solve my problems listed above. And share it to the blog.
- If someone wants to showcase their home country and their beautiful images, feel free to add in this repo. How? Maybe create a div tag similar from my Gallery 1.
UPDATE 1 | Dec.4, 2023
Issue 1: RESIZE IMAGE.
One of the problem that I encounter while rendering my Github page is the slow loading of my pictures. Given all my pictures are large in size, which I should already expect to happen. I keep all my pictures as high quality as much as possible but in preserving these attributes each images are to be in large file size. I do post-processing in Adobe Lightroom one RAW image is ca 40mb in size after conversion to JPG it will size down to ca. 10-15mb which is stillhigh. I do not want to do again a compression in my Lightroom as I will locate each images again in my Lightroom library. So I opted to do it in CLI instead, which makes it way more faster. In my photo gallery, my images does not need to be in 100% of their actual resolution which is 6000x4000. I will resize each images to exactly 600x600 that will result to significantly lower in file size.
My approach is to use the direnv. Why? My photo gallery contains folder of the places I visited, each folder will only contain 9 photos minimum. Then will add more as I want to but not often that’s why it is better to use the .envrc because I will only open again the folder casually, so no need for constant checking whether the are new images added.
The process of creating the script is as follows:
- I check if direnv is already pre-installed to my system. Which is not so I will intsall it first. I’m using Manjaro as my distro, I will provide a link for the other distro like Ubuntu.
sudo pamac install direnv
- When I tried the direnv in one of my folders nothings happen. After installing you have to hook it to your shell so that it will work. I will only provide the code corresponding to ZSH other shell will be different. Add the following line at the end of the
~/.zshrcfile:
eval "$(direnv hook bash)"
- After that I will run
direnv allowto each of my folder ensuring that I already have .envrc withouth this you will receive an error message in the terminal.
direnv: error .envrc file not found
- I will create .envrc file which I will copy to each of my folder. So every time I will create additional directory for my photo gallery I will copy this .envrc. Something like this:
mkdir Gallery1
cp ~/jysndabu/.envrc ~/jysndabu/photos/Gallery1
My .envrc contains shell scripting that resize every images in the folder while keeping a record to the images that will be processed so that the script will not repeat the resizing of all images if I added new photos or if I enter the directory again. It will only resize untrack photos. This will not replace my original photos but to create a resized copy of each which will be loacted to the specific folder called “img”. To this we have to create a loop which check all imgaes in the folder if certain condition are met then it will perform certain tasks.
In this script I use imagemagick to resize images and grep for searching the images in the list.
First we have to create a directory called “img” for all the resized images.
mkdir img
After that we have also need to create a container to append every images name that will be processed.
touch resized_images_list.md
Then we use for loop to access each images in the directory where the .envrc is located. I include all possible formats for images.
for file in *.jpg *.jpeg *.png *.gif *.JPG *.JPEG; do
We have to store the name of the image in a variable. Basename is used to provide only the file name and extension, if we removed this we will get the full path of the image.
filename=$(basename "$file")
To check if the image is in the list of resized images, we use grep. -q to to silence it.
if ! grep -q "$filename" "resized_images_list.md"; then
If it return TRUE then we resize the image by using imagemagick.
convert "$file" -resize "600x600>" "img/$filename"
convert is the command for imagemagick then followed by the image to be resized + the process to be done to the image which is resize indicating also the the dimensions + where to save and the filename. After that we append the name of the image to our container.
echo "$filename" >> "$resized_images_li"
We end the condition by:
fi
done
But after several tries, I realized that every time I enter in the directory it will try to create again the directory “img” and the resized_images_list.md, which should not be because it was already created at the first time it run the script. So I think it is better to check first if the directory “img” and resized_images_list.md file is laready there. We use “if statement” again for this.
if ! -d "img"; then
	mkdir img
else
	echo "The directory is already exists. Skipping write directory."
fi

if ! -f "resized_images_list.md";then
	touch resized_images_list_.md"
else
	echo "The file is already exists. Skipping file creation."
fi
It did work but I still received an error message in the terminal like this every time I try to enter in the directory;
./.envrc:4: -d: command not found
mkdir: cannot create directory ‘img’: File exists
./.envrc:10: -f: command not found
My full script will look like this:
#!/bin/bash

if ! -d "img"; then
	mkdir img
else
	echo "The directory is already exists. Skipping write directory."
fi

if ! -f "resized_images_list.md"; then
	touch resized_images_list.md
else
	echo "The file is already exists. Skipping file creation."
fi

for file in *.jpg *.jpeg *.png *.gif *.JPG *.JPEG; do
	filename=$(basename "$file")

	if ! grep -q "$filename" "resized_images_list.md"; then
		convert "$file" -resize "600x600>" "img/$filename"

		echo "$filename" >> resized_images_list.md
	fi
done
Task for Week 3
- Tasks from Week 1
- To automate the creation of my gallery container each location like in Phil.md, Simbach.md, Heidelburg.md so everytime I add new collection it will self generate this markdown file.
Note: Revision Feb 6, 2024.
After few times using the .envrc script I updated the script above and no longer in use. I revise the script with relation to the other automation I did. The .envrc does not contain solely image resizing but with image description aswell. The new code is written with a name AddAdditionalImageswithdivtag.sh, which is posted in blog post 3.
My Script vs Manual Input (FEB 6, 2024)
“Passau” album was used to caculate the time difference for manual input and with the use of the script. The gallery contain 9 photos. Doing the manual resizing using the Adobe Lightroom, It took me 2 minutes 41 seconds to resize 9 photos if I use the a script it took me 6.35 seconds for the same number og photos. How much I save with my time? 2 mins and 35 seconds.
UPDATE 2 | Dec.11, 2023
Issue 2: MANUAL INPUT OF IMAGE DESCRIPTION FROM A META DATA.
Next issue was my manually typing of the image description of each images. I decided to create also a script where I am able to fetch all the necessary description from the metadata of the photo and put it as a description of the photo, as it takes time to do it manually. I will be using the EXIFTOOL and AWK to do this. Here is the link for the documenation of exiftool. Then after extracting the meta data, I will create a mardown file which contains the metadata but will be formatted with html tags. So that, I will not also manually type my markdown file from scratch.
First, I set the directory of my terminal where are the photos located. In this example I use the folder “Simbach”. Then in the command line:
exiftool photo1.jpg
Then the result will be like this:
ExifTool Version Number         : 12.70
File Name                       : photo1.jpg
Directory                       : .
File Size                       : 3.6 MB
File Modification Date/Time     : 2023:12:03 09:02:24+01:00
File Access Date/Time           : 2023:12:03 09:02:24+01:00
File Inode Change Date/Time     : 2023:12:04 21:39:53+01:00
File Permissions                : -rw-r--r--
File Type                       : JPEG
File Type Extension             : jpg
MIME Type                       : image/jpeg
Exif Byte Order                 : Little-endian (Intel, II)
Make                            : Canon
Camera Model Name               : Canon EOS M50
Software                        : Adobe Imagecore (Linux)
Modify Date                     : 2023:12:03 12:12:59
Artist                          : aton
Exposure Time                   : 1/400
F Number                        : 6.3
Exposure Program                : Program AE
ISO                             : 100
Sensitivity Type                : Recommended Exposure Index
Recommended Exposure Index      : 100
Exif Version                    : 0231
Date/Time Original              : 2023:12:03 10:02:24
Create Date                     : 2023:12:03 10:02:24
Offset Time                     : +00:00
Offset Time Original            : +01:00
Offset Time Digitized           : +01:00
Shutter Speed Value             : 1/400
Aperture Value                  : 6.3
Exposure Compensation           : 0
Max Aperture Value              : 2.0
Metering Mode                   : Multi-segment
Flash                           : No Flash
Focal Length                    : 22.0 mm
Sub Sec Time Original           : 67
Sub Sec Time Digitized          : 67
Color Space                     : Uncalibrated
Focal Plane X Resolution        : 2789.976288
Focal Plane Y Resolution        : 2789.976288
Focal Plane Resolution Unit     : cm
Custom Rendered                 : Normal
Exposure Mode                   : Auto
White Balance                   : Auto
Scene Capture Type              : Standard
Serial Number                   : 123030015754
Lens Info                       : 22mm f/?
Lens Model                      : EF-M22mm f/2 STM
Lens Serial Number              : 0000000000
Current IPTC Digest             : ee90f49323fa8450b41a7f27be73cf06
Coded Character Set             : UTF8
Application Record Version      : 4
Time Created                    : 10:02:24+01:00
Digital Creation Date           : 2023:12:03
Digital Creation Time           : 10:02:24+01:00
By-line                         : aton
IPTC Digest                     : ee90f49323fa8450b41a7f27be73cf06
Profile CMM Type                : Apple Computer Inc.
Profile Version                 : 4.0.0
Profile Class                   : Display Device Profile
Color Space Data                : RGB
Profile Connection Space        : XYZ
Profile Date Time               : 2015:10:14 13:08:57
Profile File Signature          : acsp
Primary Platform                : Apple Computer Inc.
CMM Flags                       : Not Embedded, Independent
Device Manufacturer             : Apple Computer Inc.
Device Model                    :
Device Attributes               : Reflective, Glossy, Positive, Color
Rendering Intent                : Perceptual
Connection Space Illuminant     : 0.9642 1 0.82491
Profile Creator                 : Apple Computer Inc.
Profile ID                      : e5bb0e9867bd46cd4bbe446ebd1b7598
Profile Description             : Display P3
Profile Copyright               : Copyright Apple Inc., 2015
Media White Point               : 0.95045 1 1.08905
Red Matrix Column               : 0.51512 0.2412 -0.00105
Green Matrix Column             : 0.29198 0.69225 0.04189
Blue Matrix Column              : 0.1571 0.06657 0.78407
Red Tone Reproduction Curve     : (Binary data 32 bytes, use -b option to extract)
Chromatic Adaptation            : 1.04788 0.02292 -0.0502 0.02959 0.99048 -0.01706 -0.00923 0.01508 0.75168
Blue Tone Reproduction Curve    : (Binary data 32 bytes, use -b option to extract)
Green Tone Reproduction Curve   : (Binary data 32 bytes, use -b option to extract)
XMP Toolkit                     : Adobe XMP Core 7.0-c000 1.000000, 0000/00/00-00:00:00
Creator Tool                    : Adobe Imagecore (Linux)
Metadata Date                   : 2023:12:03 12:12:59Z
Format                          : image/jpeg
Lens                            : EF-M22mm f/2 STM
Image Number                    : 0
Approximate Focus Distance      : 4294967295
Flash Compensation              : 0
Firmware                        : 1.1.0
Date Created                    : 2023:12:03 10:02:24.67+01:00
Document ID                     : xmp.did:2a89b5fe-7d67-4db5-b13b-5dcb90e75d85
Instance ID                     : xmp.iid:2a89b5fe-7d67-4db5-b13b-5dcb90e75d85
Original Document ID            : xmp.did:2a89b5fe-7d67-4db5-b13b-5dcb90e75d85
Creator                         : aton
History Action                  : derived, saved
History Parameters              : converted from image/x-canon-cr3 to image/jpeg, saved to new location
History Instance ID             : xmp.iid:2a89b5fe-7d67-4db5-b13b-5dcb90e75d85
History When                    : 2023:12:03 12:12:59Z
History Software Agent          : Adobe Imagecore (Linux)
History Changed                 : /
Derived From                    :
DCT Encode Version              : 100
APP14 Flags 0                   : [14], Encoded with Blend=1 downsampling
APP14 Flags 1                   : (none)
Color Transform                 : YCbCr
Image Width                     : 5012
Image Height                    : 3836
Encoding Process                : Baseline DCT, Huffman coding
Bits Per Sample                 : 8
Color Components                : 3
Y Cb Cr Sub Sampling            : YCbCr4:4:4 (1 1)
Aperture                        : 6.3
Image Size                      : 5012x3836
Megapixels                      : 19.2
Scale Factor To 35 mm Equivalent: 1.9
Shutter Speed                   : 1/400
Create Date                     : 2023:12:03 10:02:24.67+01:00
Date/Time Original              : 2023:12:03 10:02:24.67+01:00
Modify Date                     : 2023:12:03 12:12:59+00:00
Date/Time Created               : 2023:12:03 10:02:24+01:00
Digital Creation Date/Time      : 2023:12:03 10:02:24+01:00
Circle Of Confusion             : 0.016 mm
Depth Of Field                  : inf (4.89 m - inf)
Field Of View                   : 46.3 deg
Focal Length                    : 22.0 mm (35 mm equivalent: 42.1 mm)
Hyperfocal Distance             : 4.89 m
Light Value                     : 14.0
Lens ID                         : Canon EF-M 22mm f/2 STM
It printed all the available description embedded to the image. The good thing from using the imagemagick for resizing the image is it retains all the metadata of the imgae. I tried using different tool but some attributes are removed.
After knowing the result of exiftool, I check to the attributes that I only need which are Model, Exposure Time, FNumber, ISO, and LensID. To get only these I add this to exiftool -attribute:
exiftool -Model -ExposureTime -FNumber -ISO -LensModel photo1.jpg
And the result would be like this:
Camera Model Name               : Canon EOS M50
Exposure Time                   : 1/400
F Number                        : 6.3
ISO                             : 100
LensID                 	        : Canon EF-M 22mm f/2 STM
Exifttool can also output this into a JSON format by just adding -j in the code. But I will not be using this format.
exiftool -j -Model -ExposureTime -FNumber -ISO -LensModel photo1.jpg
In the result you would expect something like this:
[{
  "SourceFile": "photo1.jpg",
  "Model": "Canon EOS M50",
  "ExposureTime": "1/400",
  "FNumber": 6.3,
  "ISO": 100,
  "LensModel": "EF-M22mm f/2 STM"
}]
After getting only the necessary attributes I should combine all these description into a one line only to look like this: “Canon EOS M50, EF-M22mm f/2 STM, 1/400 sec, f/6.3, ISO100”. The script that I will be making should iterate to each images to read the metadata and append it to a new markdown which will be my container for the photo gallery. I will use for loop to iterate to all images and awk to output only the necessary fields or decription. From week 2 I created a script to resize the images automatically, the next step for that is to create a markdown file which will serve as my container for my photo gallery like the Phil.md or Simbach.md. The script will be like this:
touch "$(basename "$(pwd)").md"
for file in *.{jpg,jpeg,png,gif,JPG,JPEG}; do
model=$(exiftool -Model $file | awk -F': ' '{print $2}')
exposuretime=$(exiftool -ExposureTime $file | awk -F': ' '{print $2}')
fnumber=$(exiftool -FNumber $file | awk -F': ' '{print $2}')
iso=$(exiftool -ISO $file | awk -F': ' '{print $2}')
lensmodel=$(exiftool -LensID $file | awk -F': ' '{print $2}')
echo -e "")/img/$file)\n" >> "$(basename "$(pwd)").md"
echo -e "$model, $lensmodel, $exposuretime-sec, f/$fnumber, ISO$iso\n" >> "$(basename "$(pwd)").md"
done
Creating the markdown file, I will name it base on the name of the directory itself. We use pwd(print working directory) to get the directory name then basename for getting only the last part of the directory. If I try pwd in the terminal it will give this:
/home/jayson/jysndabu/photos/Simbach
To get the Simabch name, I added basename.
touch "$(basename "$(pwd)").md"
Then we loop to each images like what I did from my previous script..
for file in *.{jpg,jpeg,png,gif,JPG,JPEG}; do
Then I will create a variable in which the value will be the result of the combine command of exiftool and awk. I used exiftool to get one information from the meta data of the image then the result will be this: ** Camera Model Name : Canon EOS M50** but I only need the “Canon EOS M50” so I will use awk to get that.
model=$(exiftool -Model $file | awk -F': ' '{print $2}')
Then after getting all the necessary description I will append this to the created markdown file formatted to an image tag for markdown followed by description.
! [Alt Text] (Image Path)
Image Description
echo -e "")/img/$file)\n" >> "$(basename "$(pwd)").md"
echo -e "$model, $lensmodel, $exposuretime-sec, f/$fnumber, ISO$iso\n" >> "$(basename "$(pwd)").md"
After running this it created what I need but it also gave an error.
The context of my md file created by this script:
Canon EOS M50, EF-M22mm f/2 STM, 1/400-sec, f/6.3, ISO100
Canon EOS M50, 56mm F1.4 DC DN | Contemporary 018, 1/640-sec, f/5.0, ISO100
Canon EOS M50, 56mm F1.4 DC DN | Contemporary 018, 1/800-sec, f/5.6, ISO100
Canon EOS M50, 56mm F1.4 DC DN | Contemporary 018, 1/400-sec, f/4.0, ISO100

Canon EOS M50, 56mm F1.4 DC DN | Contemporary 018, 1/640-sec, f/5.0, ISO100
Canon EOS M50, EF-M22mm f/2 STM, 1/320-sec, f/5.6, ISO100
Canon EOS M50, 56mm F1.4 DC DN | Contemporary 018, 1/800-sec, f/3.5, ISO100
Canon EOS M50, EF-M22mm f/2 STM, 1/500-sec, f/7.1, ISO100

Canon EOS M50, 56mm F1.4 DC DN | Contemporary 018, 1/640-sec, f/5.0, ISO100

, , -sec, f/, ISO

, , -sec, f/, ISO

, -sec, f/, ISO

, , -sec, f/, ISO

, , -sec, f/, ISO
In the terminal, the error message is like this:
Error: File not found - *.jpeg
Error: File not found - *.png
Error: File not found - *.gif
Error: File not found - *.JPG
Error: File not found - *.JPEG
You can see in the last part of the markdown there are lines that are empty and unnecessary. I did not know what was the problem with my for loop, but it also treat these *.jpg, *.png, *.gif, *.JPG, *.JPEG as an actual image. That is why they are also included in the list which it should not be.
So to resolve this, we add condition to skip these files.
if [ "$file" != "*.jpeg" ] && [ "$file" != "*.png" ] && [ "$file" != "*.gif" ] && [ "$file" != "*.JPG" ] && [ "$file" != "*.JPEG" ];
The full script will be like this and fixed the error:
touch "$(basename "$(pwd)").md"
for file in *.{jpg,jpeg,png,gif,JPG,JPEG}; do
if [ "$file" != "*.jpg" ] && [ "$file" != "*.jpeg" ] && [ "$file" != "*.png" ] && [ "$file" != "*.gif" ] && [ "$file" != "*.JPG" ] && [ "$file" != "*.JPEG" ]; then
model=$(exiftool -Model $file | awk -F': ' '{print $2}')
exposuretime=$(exiftool -ExposureTime $file | awk -F': ' '{print $2}')
fnumber=$(exiftool -FNumber $file | awk -F': ' '{print $2}')
iso=$(exiftool -ISO $file | awk -F': ' '{print $2}')
lensmodel=$(exiftool -LensID $file | awk -F': ' '{print $2}')
echo -e "")/img/$file)\n" >> "$(basename "$(pwd)").md"
echo -e "$model, $lensmodel, $exposuretime-sec, f/$fnumber, ISO$iso\n" >> "$(basename "$(pwd)").md"
fi
done
After this I can modify the markdown file to add description of the place and link this to my photo gallery page. But with this format I will not be able to use my css script.
Task for Week 4
The only issue I have with this is that it can only be used once, if I add new images and rerun this it will iterate all over again to all images then append all the description to my existing markdown doubling down the result. Also if I modified the markdown adding new content after the images, it should echo next to the last image created not at the end of the markdown file. For example
Canon EOS M50, Canon EF-M 15-45mm f/3.5-6.3 IS STM, 1/640-sec, f/3.5, ISO500
Canon EOS M50, Sigma 56mm f/1.4 DC DN | C, 1/640-sec, f/3.5, ISO100
INSERTION SHOULD BE HERE
*[Homepage](/Shutter101/)*
*[Bact to Repository](https://github.com/23W-GBAC/Shutter101/tree/main)*
NOT HERE
And that would be my task for next week.
- To polish the “auto generate description” script to make it reusable.
- Try to merge the script of Resize Image and Auto Generate Description.
My Script vs Manual Input (FEB 6, 2024)
“Passau” album was used to caculate the time difference for manual input and with the use of the script. The gallery contain 9 photos. With fetching the image description, I need to open each photos and check the metadata in the summary description, which is also time consuming. 4 minutes and 5 seconds is what I need to get the metadata of 9 photos, with the script it is just 4.18 seconds. For the creation of my base mardkdown file and if I manually input everything, the required for me is 10 minutes and 45 seconds. A huge difference if I use a script which took only 1 second!! Around 14 minutes and 44 seconds of my time is save if using the script for 9 photos.
Note: Revision Feb.6, 2024
*The code above will no longer exist as seperate script, I revised it and combine all the automation into 1 script The new code is posted in blog post 3. __
UPDATE 3 | Dec.22, 2023
ORGANIZE AUTOMATICALLY NEWLY ADDED COLLECTION OF IMAGES INCLUDING AUTOMATIC SELECTING OF THE THUMBNAIL.
To answer my previous issue, I poslished and combined the previous scripts of resizing and the meta data extraction into one script. This script (Resize and Meta Data Extraction with div tag.sh) will be run only once at the beginning when I create new album in the photogallery. It will also create the necessary markdown files that I will be using later for my portfolio. I also change the format of my photogallery container, I used html tag like figure and figure tag to customize the layout of the images. There will be two version of my scripts one with pure markdown format and the other is with html tags.
In addition to that, I have also included a feature where it will also automatically insert the new album to my photogallery by using grep and sed. Grep will ceck if the album is already in the photo gallery if not then it will run sed. Sed will then search my insertion point which will be the “</div>”, it will insert the new figure tag before the </div>.
figuretag=$"	<figure>\n\t\t<img src='/Shutter101/photos/$(basename "$(pwd)")/img/$photocover' alt='$photocover'>\n\t\t<figcaption><a href='/Shutter101/photos/$(basename "$(pwd)")/$(basename "$(pwd)").html'>$(basename "$(pwd)")</a></figcaption>\n\t</figure>"

if ! grep -q "$(basename "$(pwd)")" ~/jysndabu/photogallery.md; then
        sed  -i "/<\/div>/i $figuretag" ~/jysndabu/photogallery.md
And I also use shuf for the automatic selection of the photo cover for that collection. It will shuffle the images from the given list then select the first item in the list. But if I have a desired covered photo, of course I sill need to maually select that image.
photocover=$(shuf -n 1 resized_images_list.md)
The full script is as follows:
#Create folder container (img) for resized images, markdown file for master list of resized images and a base MD file for the photogallery.
if ! -d "img"; then
        mkdir img
else
        echo "The directory is already exists. Skipping write directory."
fi

if ! -f "resized_images_list.md"; then
        touch resized_images_list.md
else
        echo "The file is already exists. Skipping file creation."
fi

if ! -f "$(basename "$(pwd)").md"; then
        touch "$(basename "$(pwd)").md"
        echo -e "## $(basename "$(pwd)")\n" >> $(basename "$(pwd)").md
else
        echo "The file is already exists. Skipping file creation."
fi

#Iterate to each images in the folder
for file in *.jpg *.jpeg *.png *.gif *.JPG *.JPEG; do
        if [ -f "$file" ]; then
                filename=$(basename "$file")

                if ! grep -q "$filename" "resized_images_list.md"; then
                        #Using ImageMagick resize image to a lower resolution.
                        convert "$file" -resize "600x400>" "img/$filename"
                        echo "Resizing of $file done."

                        #Append the image name to the master list.
                        echo "$filename" >> resized_images_list.md
                        echo "Image added to the list."

                        #Create variables as container of the meta data.
                        model=$(exiftool -Model $file | awk -F': ' '{print $2}')
                        exposuretime=$(exiftool -ExposureTime $file | awk -F': ' '{print $2}')
                        fnumber=$(exiftool -FNumber $file | awk -F': ' '{print $2}')
                        iso=$(exiftool -ISO $file | awk -F': ' '{print $2}')
                        lensmodel=$(exiftool -LensID $file | awk -F': ' '{print $2}')

                        #Writing the image description using the variables created to the base markdown file for the photogallery.
                        echo -e "\t<figure>" >> $(basename "$(pwd)").md
			echo -e "\t\t<img src='/Shutter101/photos/$(basename "$(pwd)")/img/$file' alt='$file'>" >> $(basename "$(pwd)").md
			echo -e "\t\t<figcaption>$model, $exposuretime-sec, f/$fnumber, ISO$iso, $lensmodel</figcaption>" >> $(basename "$(pwd)").md
			echo -e "\t</figure>" >> $(basename "$(pwd)").md
                else
                        echo "File already processed.Skipping file."
                fi
        else
                echo "File $file does not exist."
        fi
done

#Create a variable to select a cover image from the list of images. This will shuffle the images and select the first image in the list.
photocover=$(shuf -n 1 resized_images_list.md)

#Container of Figure tag and Figure Caption.
figuretag=$"	<figure>\n\t\t<img src='/Shutter101/photos/$(basename "$(pwd)")/img/$photocover' alt='$photocover'>\n\t\t<figcaption><a href='/Shutter101/photos/$(basename "$(pwd)")/$(basename "$(pwd)").html'>$(basename "$(pwd)")</a></figcaption>\n\t</figure>"

#Append before the </div> the figuretag to my markdown file that contains my portfolio(photogallery.md).
if ! grep -q "$(basename "$(pwd)")" ~/jysndabu/photogallery.md; then
        sed  -i "/<\/div>/i $figuretag" ~/jysndabu/photogallery.md
        #Write the ending part  for the photogallery.
        echo -e "*[Homepage](/Shutter101/)*\n" >>  $(basename "$(pwd)").md
        echo -e "*[Bact to Repository](https://github.com/23W-GBAC/Shutter101/tree/main)*\n" >> $(basename "$(pwd)").md
else
    echo "Already in photo gallery container."
fi
The next script (AddAdditionalImageswithdivtag.sh) will run as .envrc. The purpose of this is to check everytime I enter the folder if new images are added. If there are new images, it will resize and extract the meta data of the image then revise the respective markdown files. But be sure that direnv allow is turn on to the desired directory for this script to work.
#Iterate to all images in the folder
for file in *.jpg *.jpeg *.png *.gif *.JPG *.JPEG; do
        #Check whether the file exist.
        if [ -f "$file" ]; then
                filename=$(basename "$file")

                #Check wether the image was  already resized, it means if it is in the master list.
                if ! grep -q "$filename" "resized_images_list.md"; then
                        #If False do the convertion and extraction of Meta Data.
                        convert "$file" -resize "600x400>" "img/$filename"

                        echo "Resizing of $file done."
                        echo "$filename" >> resized_images_list.md


                        model=$(exiftool -Model $file | awk -F': ' '{print $2}')
                        exposuretime=$(exiftool -ExposureTime $file | awk -F': ' '{print $2}')
                        fnumber=$(exiftool -FNumber $file | awk -F': ' '{print $2}')
                        iso=$(exiftool -ISO $file | awk -F': ' '{print $2}')
                        lensmodel=$(exiftool -LensID $file | awk -F': ' '{print $2}')

                        imagedescription="<figure>\n\t<img src='/Shutter101/photos/$(basename "$(pwd)")/img/$file' alt='$file'>\n\t<figcaption>$model, $exposuretime-sec, f/$fnumber, ISO$iso, $lensmodel</figcaption>\n</figure>"

                        #Insert the description before the word "END" in the photogallery.md.
                        sed  -i "/End/i $imagedescription" "$(basename "$(pwd)").md"

                        echo "Image description of $file added to $(basename "$(pwd)").md."

                fi
        fi
done
MY REQUEST TO EVERYONE
I am requesting for someone to try my script by adding your photos in my blog. Forked it, add new branch, add the images then run the script in your machine.
But make sure that exiftool, imagemagick, grep, awk and shuf are installed to your machine.
For those who whant to try, here is a simple guide on how would you proceed on using the script.
- Create a folder with a name base on the location of youre photos in ~/jysndabu/photos/
- Copy the photos you would like to share in the folder you created
- Copy the script ‘Resize and Meta Data Extraction with div tag.sh’ and ‘.envrc’ from ~/jysndabu/Script to the folder you created
- Then in the terminal run ‘sh Resize and Meta Data Extraction with div tag.sh’
- Modify the *Location.md if you would like to add some description to your photogallery
- Delete all copied(original) photos so that it will not be committed to the repository
- Run ‘direnv allow’ in the terminal, for future addition of images
- Finally, push your changes
*Location refers to the name of created folder
The result should be like this:
## GG

<link rel='stylesheet' href='/Shutter101/css/photo-tile.css'>
<div class='gallery'>
	<figure>
		<img src='/Shutter101/photos/GG/img/IMG_3206-2.jpg' alt='IMG_3206-2.jpg'>
		<figcaption>Canon EOS M3, 1/250-sec, f/2.8, ISO320, Canon EF-M 22mm f/2 STM</figcaption>
	</figure>
	<figure>
		<img src='/Shutter101/photos/GG/img/IMG_3494-2.jpg' alt='IMG_3494-2.jpg'>
		<figcaption>Canon EOS M3, 1/500-sec, f/4.0, ISO200, Canon EF-M 22mm f/2 STM</figcaption>
	</figure>
	<figure>
		<img src='/Shutter101/photos/GG/img/IMG_3528.jpg' alt='IMG_3528.jpg'>
		<figcaption>Canon EOS M3, 1/250-sec, f/4.0, ISO200, Canon EF-M 22mm f/2 STM</figcaption>
	</figure>
	<figure>
		<img src='/Shutter101/photos/GG/img/IMG_3718.jpg' alt='IMG_3718.jpg'>
		<figcaption>Canon EOS M3, 1/500-sec, f/9.0, ISO200, Canon EF-M 22mm f/2 STM</figcaption>
	</figure>

*[Homepage](/Shutter101/)*

*[Bact to Repository](https://github.com/23W-GBAC/Shutter101/tree/main)*
I also need some feedback regarding with my code as you can see I have used a lot of conditional statements if and else. I can ommit these if and else statement but making sure that the script will be run only once because it you run it again and it will just continue to add the images without checking if they are already in the photo gallery.
If you encounter a problem doing this or something is not right, please don’t hesitate to contact me.
My Script vs Manual Input (FEB 6, 2024)
“Passau” album was used to caculate the time difference for manual input and with the use of the script. The gallery contain 9 photos. Using the script Resize and Meta Data Extraction with div tag.sh it only took 9 seconds to complete the resizing, metadata extraction and base markdown creation. Manually doing it will require me for around 17 minutes and 30 seconds.
UPDATE 4 | Jan. 1, 2024
FILE HANDLING OF IMAGES –> CAMERA TO LAPTOP –> ONLY COPY IMAGES THAT ARE MARKED.
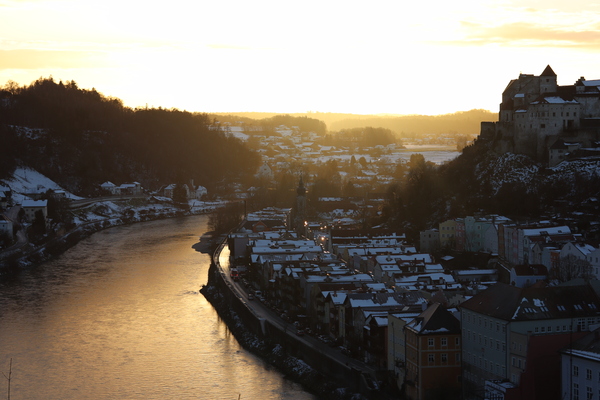
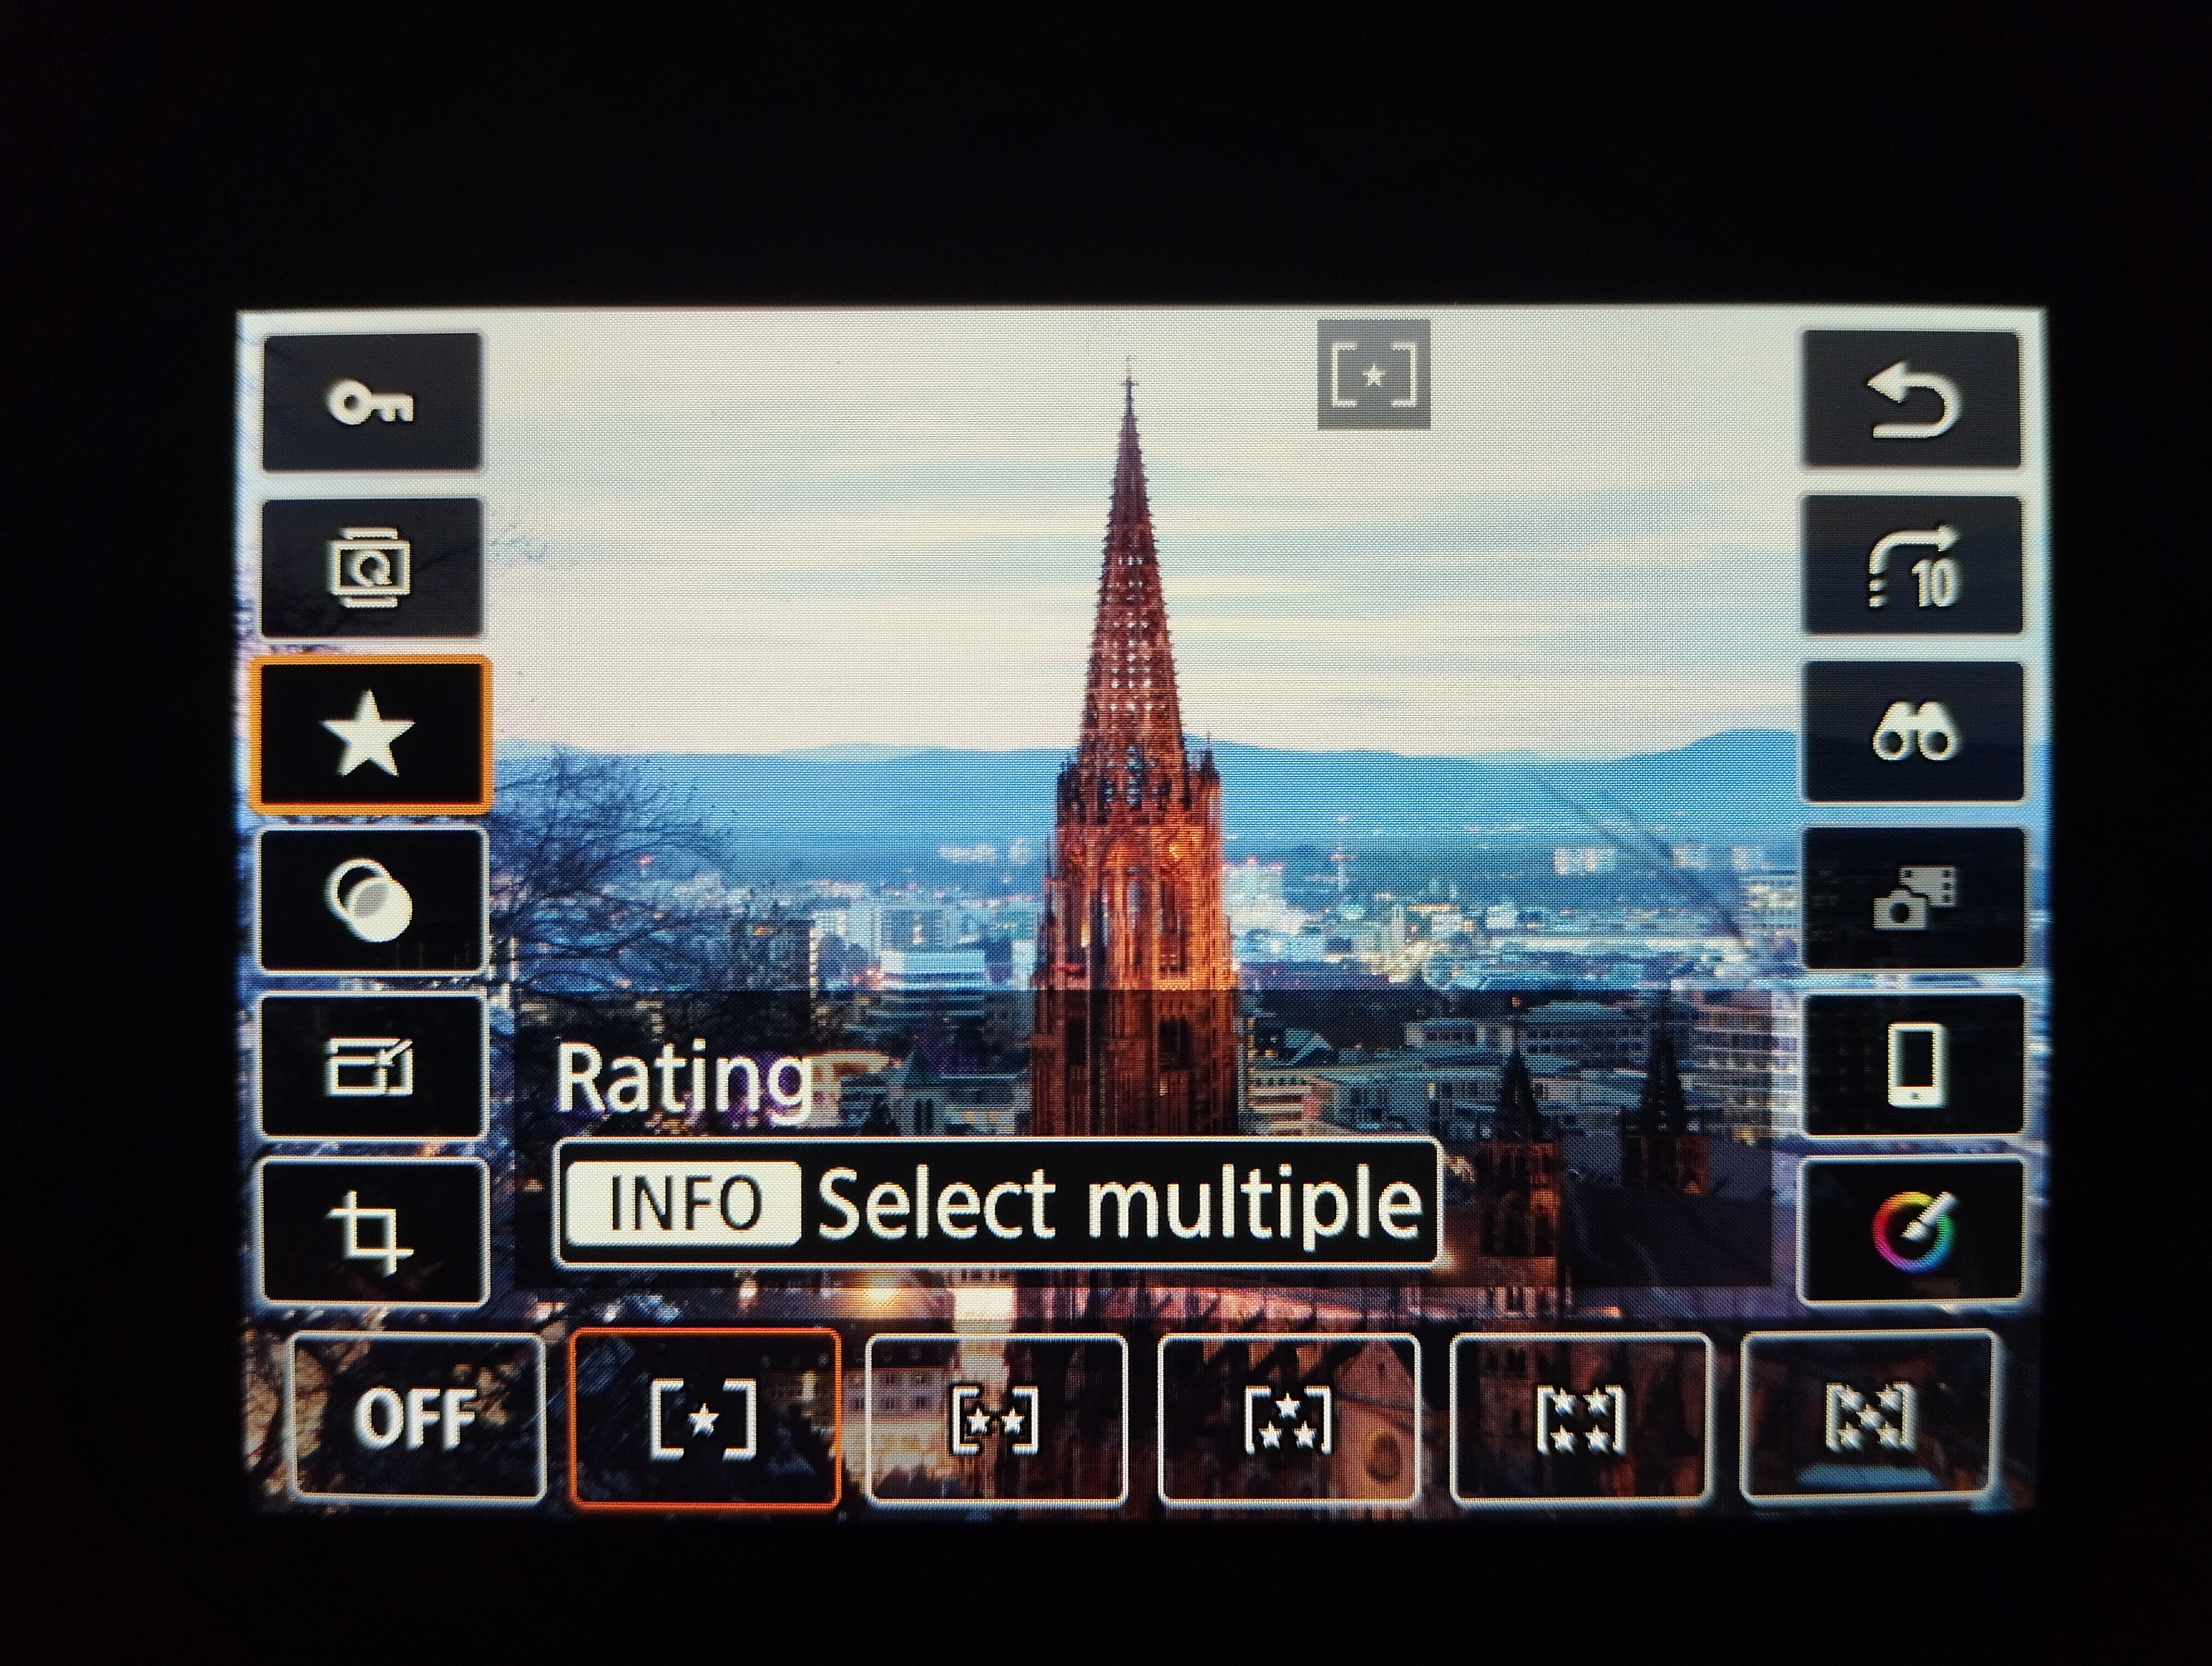
When I do photography, most of the time I ended up with hundreds of images at the end of the day. Then going back to my place, I try to mark the images that are worth editing. If for example I took 700+ images maybe 50 or 100 from that list will only be imported to Adobe Lightroom software. Normally what I do is I import all images to the Adobe Lightroom (Desktop Version) and filter the images that are marked or starred. Here is what I mean by marking the photo:
Now that I am using Linux based OS, I am using the web version of Adobe Lightroom which the features are limited and filterring the images is gone so I need to manually checked each images on my camera which are marked then seperate those images for import to Lightroom. Which is quite boring and time consuming, imagine if you have over a thousand of images and you have to check again all images if which are marked. That is exhausting right? And because I have already explored the METADATA why not use this again to filter the images. In addition to this, I want also to speed up the process of getting those images straight away from my camera SD card without copying all images to my laptop.
Using BASH scripting again, I will create a script which I will copy to my camera memory card. Running this script will iterate again through all images from the current directory, if meeting the condition, it will copy this image to my designated location in my laptop. Here is the script. I will be using again EXIFTOOL and AWK for this automation.
#Iterate to each images in the current directory.
for file in *.CR3; do

        #Using exiftool for getting the "Rating" of each images then passing to awk to get the numerical value only.
        rating=$(exiftool -Rating "$file" | awk -F': ' '{print $2}')

        #Check if it is working, this can be removed.
        echo "File: $file, Rating: $rating"

        #Check the rating of the image, Starred images should shoukd have a rating of 1.
        if [[ "$rating" == "1" ]]; then

            #Check if it is working, this can be removed.
            echo "Copying $file to ~/Pictures/StarredImages/"

            #Copy image to my designated folder
            cp "$file" ~/Pictures/StarredImages/
        fi
done
Here is my example of using this script:
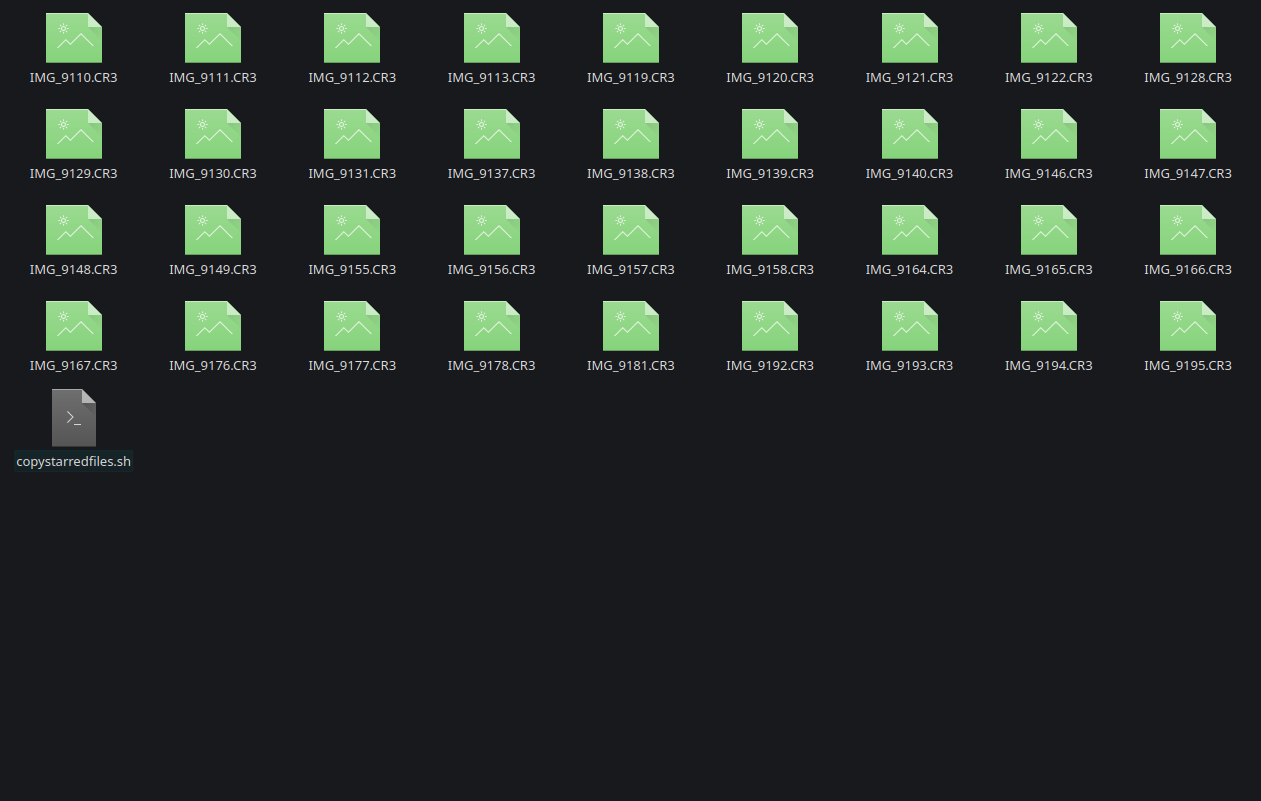
I have 36 images in a folder. Not all of them are starred. We will check if how many are starred. If starred, then the rating should have a value of 1.
Running exiftool -Rating * will result to these:
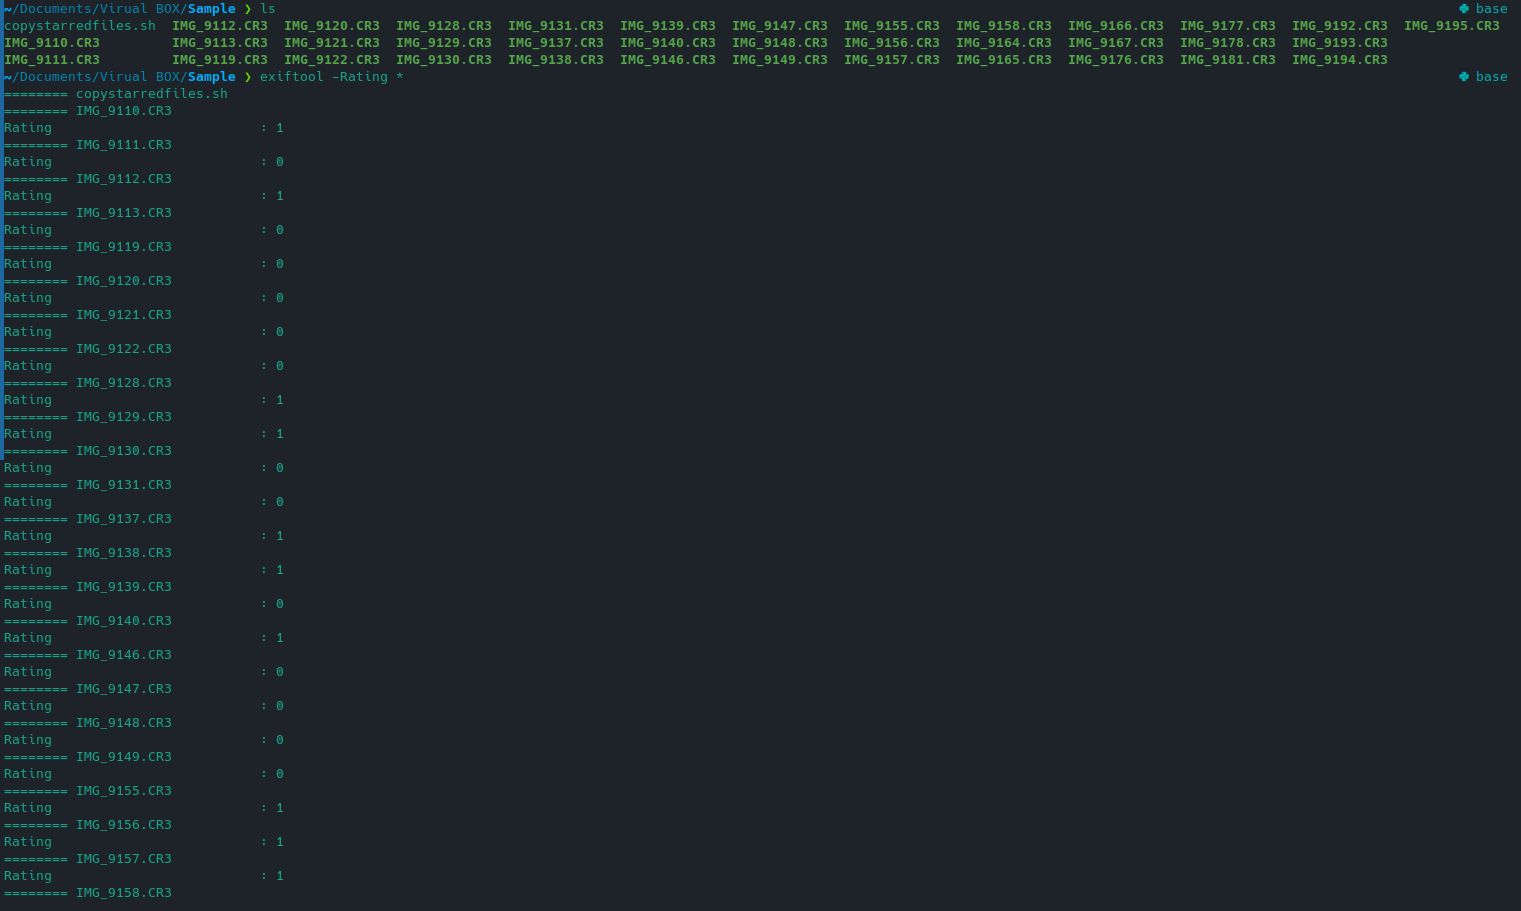
======== IMG_9110.CR3
Rating                          : 1
======== IMG_9111.CR3
Rating                          : 0
======== IMG_9112.CR3
Rating                          : 1
======== IMG_9113.CR3
Rating                          : 0
======== IMG_9119.CR3
Rating                          : 0
======== IMG_9120.CR3
Rating                          : 0
======== IMG_9121.CR3
Rating                          : 0
======== IMG_9122.CR3
Rating                          : 0
======== IMG_9128.CR3
Rating                          : 1
======== IMG_9129.CR3
Rating                          : 1
======== IMG_9130.CR3
Rating                          : 0
======== IMG_9131.CR3
Rating                          : 0
======== IMG_9137.CR3
Rating                          : 1
======== IMG_9138.CR3
Rating                          : 1
======== IMG_9139.CR3
Rating                          : 0
======== IMG_9140.CR3
Rating                          : 1
======== IMG_9146.CR3
Rating                          : 0
======== IMG_9147.CR3
Rating                          : 0
======== IMG_9148.CR3
Rating                          : 0
======== IMG_9149.CR3
Rating                          : 0
======== IMG_9155.CR3
Rating                          : 1
======== IMG_9156.CR3
Rating                          : 1
======== IMG_9157.CR3
Rating                          : 1
======== IMG_9158.CR3
Rating                          : 0
======== IMG_9164.CR3
Rating                          : 0
======== IMG_9165.CR3
Rating                          : 0
======== IMG_9166.CR3
Rating                          : 0
======== IMG_9167.CR3
Rating                          : 0
======== IMG_9176.CR3
Rating                          : 0
======== IMG_9177.CR3
Rating                          : 0
======== IMG_9178.CR3
Rating                          : 0
======== IMG_9181.CR3
Rating                          : 0
======== IMG_9192.CR3
Rating                          : 0
======== IMG_9193.CR3
Rating                          : 0
======== IMG_9194.CR3
Rating                          : 0
======== IMG_9195.CR3
Rating                          : 0
   36 image files read
Checking the result would tell us that 10 out of 36 are starred/marked. After this I will run sh copystarredfiles.sh:

Those 10 images are copied to my designated folder and ready to be imported to Adobe Lightroom.
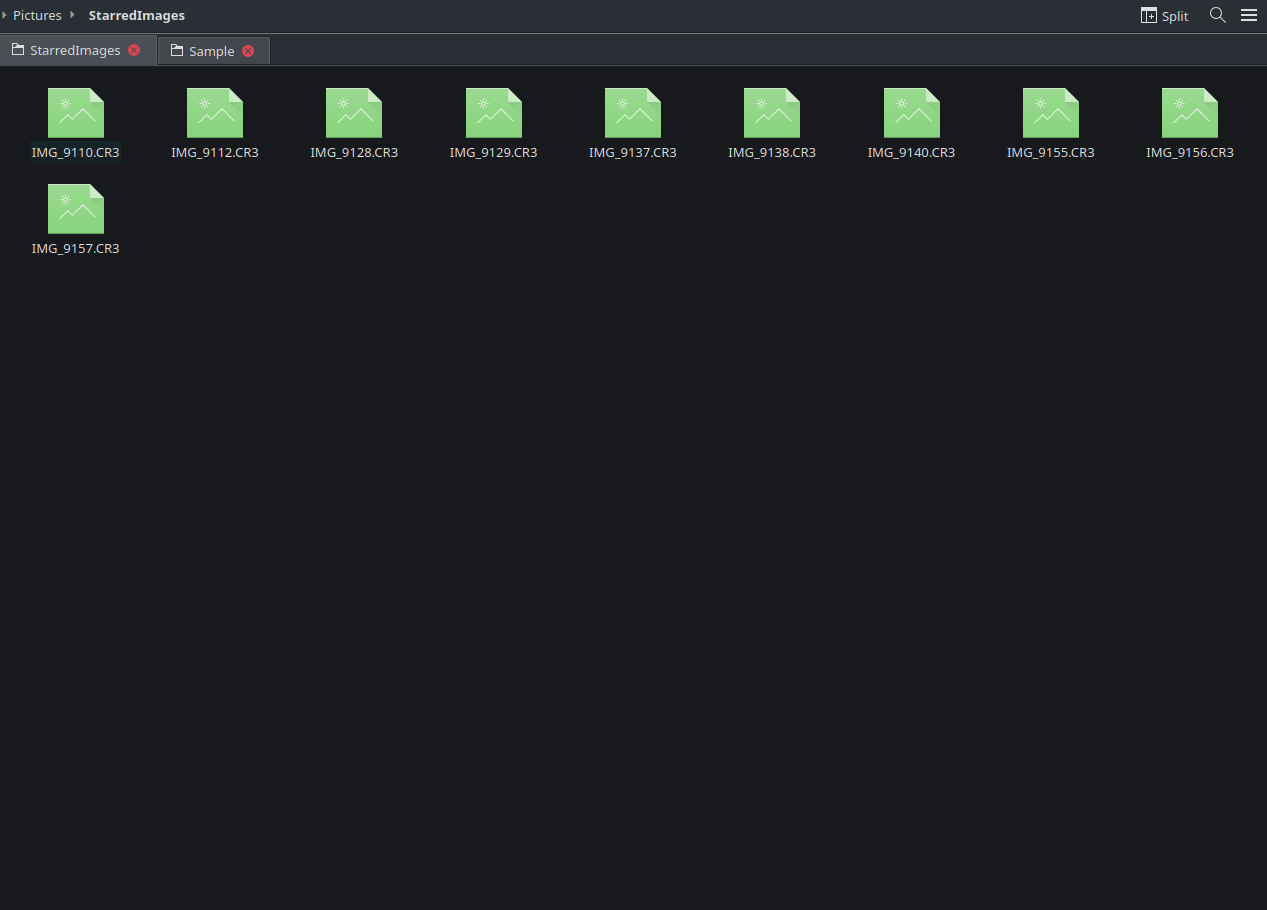
The code is working.
Using ChatGPT I asked for a Python counterpart of my code the result is this:
import os
import shutil
from subprocess import check_output

source_folder = "."  # Change this to the path of your source folder
destination_folder = "~/Pictures/StarredImages/"

# Only consider CR3 files
image_extensions = [".CR3"]

for filename in os.listdir(source_folder):
    if any(filename.lower().endswith(ext) for ext in image_extensions):
        file_path = os.path.join(source_folder, filename)

        # Use subprocess to run exiftool command
        rating = check_output(["exiftool", "-Rating", file_path], universal_newlines=True).strip()
        rating = rating.split(": ")[1] if rating.startswith("Rating") else None

        if rating == "1":
            # Copy the file to the destination folder
            shutil.copy(file_path, os.path.expanduser(destination_folder))
            print(f"Copying {filename} to {destination_folder}")
Base on the result I would prefer using the BASH instead of Python, my script consist of only of 6 lines of code instead of 14. If you will create this Python code, how would be your approach?
My Script vs Manual Input (FEB 6, 2024)
From above example it took me for about 2 minutes to manually check and copy starred images from my camera. While using the copystarredfiles.sh, it was 13 seconds only.